이번에는 화면그리기 및 레이아웃을 살펴보도록 하겠다.
Andriod Studio에서 많이 사용하는 레이아웃은 크게 5가지가 있다.
ConstriantLayout, LinearLayout, TableLayout, GirdLayout, RelativeLayout
이 중에서도 맨 바깥쪽 레이아웃(화면 출력용)은 LinearLayout과 RelativeLayout을 주로 사용한다.
그럼, 이 둘의 차이를 알아보자.
1. LinearLayout
LinearLayout은 가로, 세로 배치로 TextView를 넣었을 때 겹쳐지지 않는다. 다만 TextView 정렬을 위해 정렬 방법을 결정해야 한다.
만약, 가로 배치를 하고 싶다면, LinearLayout 구역에
andriod:orentation="horizontal"세로 배치를 하고 싶다면,
android:orientation="vertical"을 작성하면 된다.
아래 사진은 각각 horizontal과 vertical로 놓았을 때 출력되는 화면이다.

2. RelativeLayout
RelativeLayout은 LinearLayout과는 다르게 android:orentation으로 정렬할 수 없다.
RelativeLayout에서 배치를 하기 위해서는 기준을 설정해야 한다.
기준을 설정하는 방법에는 두 가지가 있다.
1) RelativeLayout 기준
코드 줄은 아래와 같다.
android:layout_centerInParent="true"코드를 해석하면 RelativeLayout기준에서 정가운데에 대상을 위치한다는 것이다.
그러나 여러 개의 객체가 있을 때 각 개체 간의 관계는 정의되지 않으므로 이 역시 중첩된다고 볼 수 있다.
이를 해결한 것이 이름을 붙여 서로의 관계를 정의하는 방법이다.
2) 객체 기준
① 이름 지정하기
코드는 아래와 같다.
android:id="@+id/TextView_2"한 객체의 이름을 설정하면 나머지는 이 객체를 기준으로 위치를 정할 수 있다.
[ 왼쪽 ]
android:layout_toLeftOf="@+id/TextView_2"이렇게 하면 말 그대로 지정 객체의 왼쪽이기에 상하적으로도 맞추려면
android:layout_centerInParent="true"또한 붙여야 한다.
[ 오른쪽 ]
android:layout_toRightOf="@+id/TextView_2"
android:layout_centerInParent="true"
이렇게 하면 지정 객체의 오른쪽 밑 높이 동일하게 된다.
[ 위쪽 ]
android:layout_above="@id/TextView_2"
android:layout_centerInParent="true"
toRightOf 나 toLeftOf와는 다르게 layout_above를 사용했다.
[ 아래쪽 ]
android:layout_below="@id/TextView_2"
android:layout_centerInParent="true"
마찬가지로 layout_below를 사용했다.
그럼, 여기서 의문이 생긴다.
LinearLayout이 좀 더 활용성이 좋지 않는가?
물론 그렇고 성능도 좀 더 좋게 나온다. 하지만 RelativeLayout으로 구성하는 것이 후에 보완이 쉽다.
레이아웃 안에 레이아웃을 넣고, 또 그 안에 레이아웃을 넣는 행위를 할 수 있다.
예시는 아래와 같다.
<?xml version="1.0" encoding="utf-8"?>
<RelativeLayout
    xmlns:android="http://schemas.android.com/apk/res/android"
    android:layout_width="match_parent"
    android:layout_height="match_parent">

    <RelativeLayout
        android:layout_width="30dp"
        android:layout_height="30dp"
        android:background="#ff0000"
        android:layout_centerInParent="true"
        android:orientation="vertical"
        >

    </RelativeLayout>


</RelativeLayout>
이 외에도 레이아웃 안 TextView들을 화면을 분할등분하여 구성할 수도 있다.
코드는 아래와 같다.
<?xml version="1.0" encoding="utf-8"?>
<LinearLayout
xmlns:android="http://schemas.android.com/apk/res/android"
android:layout_width="match_parent"
android:layout_height="match_parent"
android:orientation="vertical"
android:weightSum="9"
>
<TextView
android:layout_width="match_parent"
android:layout_height="wrap_content"
android:text="1"
android:textSize="20sp"
android:layout_weight="1"
>
</TextView>
<TextView
android:id="@+id/TextView_2"
android:layout_width="match_parent"
android:layout_height="wrap_content"
android:text="2"
android:textSize="20sp"
android:layout_weight="7"
>
</TextView>
<TextView
android:layout_width="match_parent"
android:layout_height="wrap_content"
android:text="3"
android:textSize="20sp"
android:layout_weight="1"
>
</TextView>
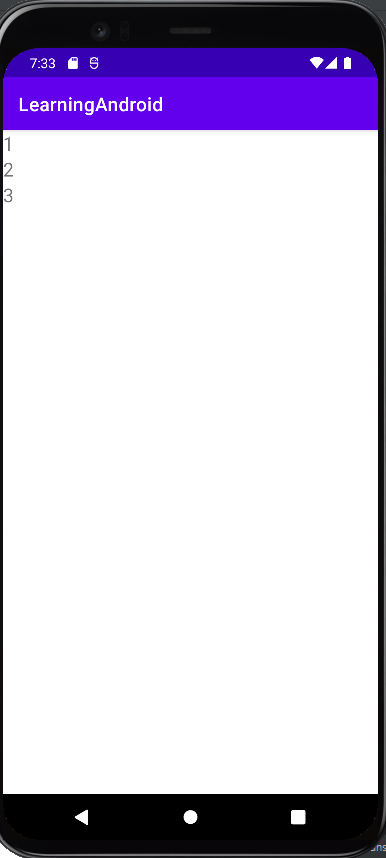
</LinearLayout>코드를 보면 기준값이 LinearLayout안에 정의되어 있다.
android:weightSum="9"android:weightSum을 9만큼 주었다는 것은 "전체 화면을 9라고 볼 때"라는 의미와도 일맥상통한다.
TextView안을 보면 각각 비율을 설정했음을 알 수 있다.
android:layout_weight="1"
android:layout_weight="7"
android:layout_weight="1"
이 외에도 android:weightSum 값을 다르게 설정함에 따라 비율도 다르게 설정할 수 있다.
이 다음 글에서는 "앱 레이아웃 따라하기 실천-1"을 다루겠다.
▼ 이전글
2021.12.28 - [앱 개발/안드로이드] - 01_Hello World 출력하기
01_Hello World 출력하기
이번에는 Hello World 출력하기를 해볼 것이다. 당연하게도, 맨 처음에는 환경을 설정해주어야 한다. Andriod Studio를 실행하여 New Project로 들어가면 아래와 같은 첫 화면이 나온다. 빠르게 생성하기
hycee-19-story.tistory.com
▼ 다음글
2021.12.29 - [앱 개발/안드로이드] - 03_앱 레이아웃 따라하기 실전-1
03_앱 레이아웃 따라하기 실전-1
이번 글에서는 앱 레이아웃 따라하기 실전편 1을 다루도록 하겠다. 시작하기에 앞서 공부한 내용을 정리하는 것이기 때문에 내용이 잘못되었을 수도 있다. 레이아웃 구성은 기존에 계속해 다루
hycee-19-story.tistory.com
'앱 개발 > 안드로이드' 카테고리의 다른 글
| 05_앱 레이아웃 따라하기 실전-3 (0) | 2022.01.03 |
|---|---|
| 04_앱 레이아웃 따라하기 실전-2 (0) | 2022.01.01 |
| 03_앱 레이아웃 따라하기 실전-1 (0) | 2021.12.29 |
| 01_Hello World 출력하기 (0) | 2021.12.28 |
| 00_Android Studio 설치하기 (0) | 2021.12.28 |


